Preparation for Mastering
- First & foremost, donât be too concerned about getting your levels up to try and match your favourite commercial song or Album. This can be achieved in the mastering stage, so you donât need to over compress your songs. A little compression on the mix buss and/or individual tracks is ok if you know what youâre doing but donât over do it, as it canât be undone when mastering & leaves little room for the mastering engineer to work. (If youâre unsure, donât compress).
- Definitely NO LIMITING ! (This should only be done as one of the last steps in the mastering stage). If youâre mixing for a client that requires a version of the songs before mastering, make two mixes, one with limiting etc. and the other without for mastering.
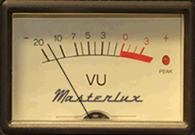
- Leave 3-6 db of headroom. In other words donât slam the meters into the red or 0 dbfs on the peak digital meters, as this leaves no headroom to play with and can lead to ugly distortion in the final stages of post production.
- DONâT NORMALISE tracks, as this only degrades the quality of audio.
- Try and record at the highest level bit rate (24 bit if possible) as this gives more headroom. So 48k 24 bit or 96k 24 bit etc. Donât worry if you havenât done this and donât change sample rates, this also should be left for the mastering stage.
- NO DITHERING ! This too is left to one of the last steps at the mastering stage.
- Getting rid of any clicks or pops, or de essing (toning down excessive sibilance - harsh âSâ sounds) is more easily done & probably more cost effective at the mixing stage on the individual tracks but can still be achieved at the mastering stage if you donât have this luxury. Vocal tracks are more often the culprit here
- If you have recorded or mixed onto tape, make a high resolution digital file from this tape mix. Playing your mix back on another tape machine can often bring up problems such as azimuth, unusual tones or tape speed headaches. These are a few of the problems with tape machines calibrated differently, or even different head wear.
- If you have the luxury or time to create a couple of extra mixes of your songs with different vocal levels, then this is a great way to ensure any compression or EQing at the mastering stage doesnât affect where your vocal sits in the song. So have the âNormal vocal mixâ then also âVocal +1dbâ louder.
- Upload songs via internet, or bring songs as Audio Data files (.WAV or .AIFF) on CD, DVD or Flash drives. (Bring a back up too!) No mp3 files as these have been stripped of all their goodness!
- Remember to keep mixes below 0 dbfs on the meters (peak level at -3 to -6 dbfs is good).
Preparation for Mastering PDF Download
|
|

